This zone shooting drill came from the FastModel Sports Basketball Plays and Drills Library.
You can also find out more about FastModel Play Diagramming software by clicking this link: FastDraw
The drills were contributed by Coach Bert DeSalvo.
Bert has a regular coaching blog, Expressions from the Hardwood. You can also follow him on Twitter @coachDeSalvo
IMO, it is important to replicate the shots that you shoot in games from your offensive system during your improvement season workouts.
That means shots you get against man to man defense as well as against zones.
Even if these shots are not a part of your zone attack, I encourage you to incorporate you cuts against zone and the shots you get into your shooting workouts.
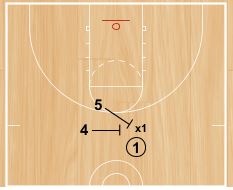
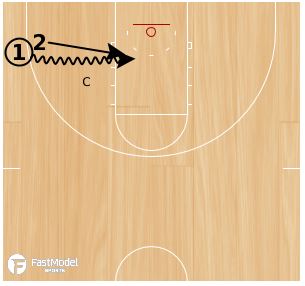
Zone Relocate and Flash Shooting Drill
Bert DeSalvo
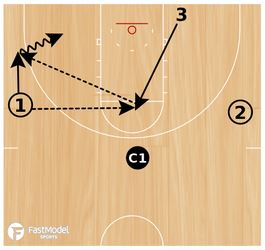
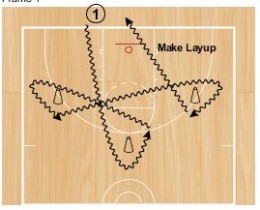
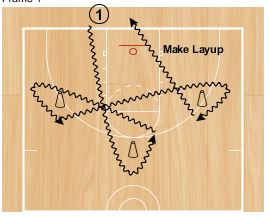
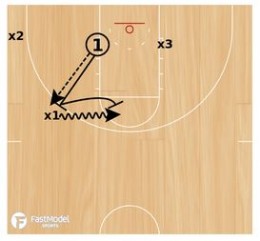
1 passes to 3 who flashes to FT line area
1 relocates (slides) towards baseline
3 passes to 1 for one-dribble pull up baseline jumper
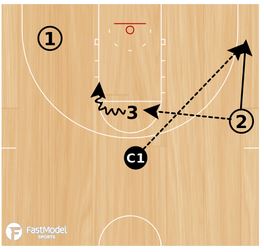
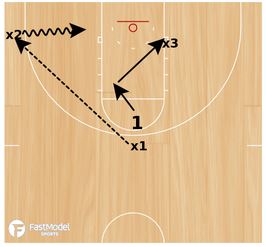
3 turns and locates 2
2 passes to 3
3 steps to the pass, takes one-dribble and shoots a FT jumper
2 slides towards Baseline
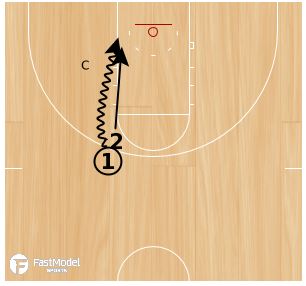
Coach 1 passes to 2
2 shoots “catch and shoot” 3pt shot