These drills were contributed by Marc Skelton, Head Coach for Fannie Lou Hamer Freedom High School in the Bronx, NY to the FastModel Sports Basketball Plays and Drills Library.
You can also find out more about FastModel Play Diagramming software by clicking this link: FastDraw
The premise of this drill is to mimic quick action in early offense.
This will improve your screening, how your guys/girls catch and shoot and read the defense.
On the flip side your defense will be able to not let cutters cut without being bumped and improve communication.
We play a game to seven.
There are three options to this drill outlined below. Drill #1 is a UCLA cut. Drill #2 works on the Ghost Screen and drill #3 has a backdoor option.
Editor’s note from Brian: The purpose of my posting this drill is to give you an idea for a drill to make your players’ more aggressive in your early offense if that is something that you emphasize. You probably run different movements than these and will need to change the movements to fit what you use.
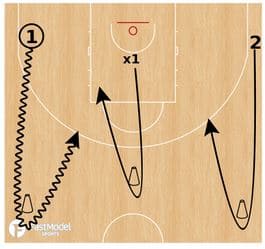
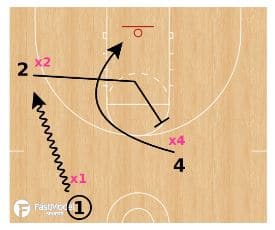
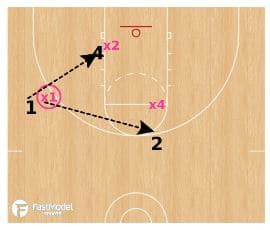
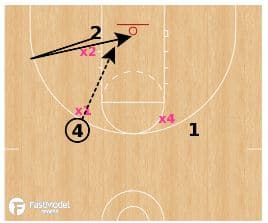
Drill #1

Offense must score in seven seconds or less.
Start this drill at half-court on the point guard’s weak hand.
1 dribbles hard at 2.
2 cuts to the basket and makes a L-cut to screen for 4.
4 dives hard and 2 pops to the 3-point line.
If you play against teams that like to switch this is a great drill to put into your offense.
4 and 2 both have mismatches to exploit.
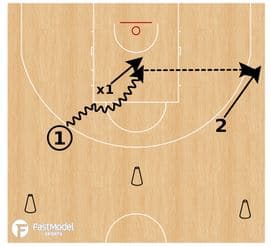
Drill #2
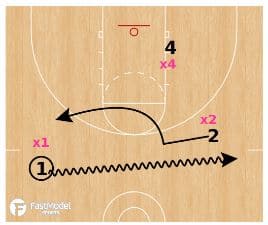
Drill # 2 has the same premise, score in seven seconds or less.
1 starts at half court and dribbles at 2.
2 sets a Ghost Screen, the kind Golden State uses.
1 passes to 2.
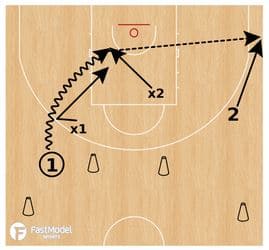
From here 2 can catch and shoot, catch and go, or hit 1 cutting to the hoop. (see next frame)
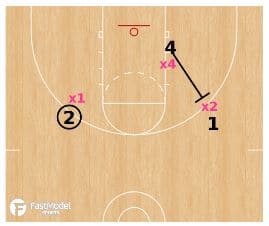
After 4 sets the back screen he/she pops to the 3-point line.
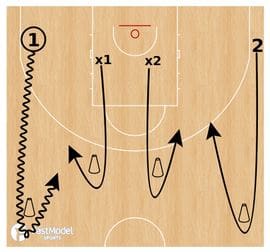
Drill #3
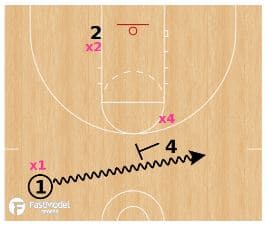
Drill #3 in my 3 on 3 seven seconds or less series is a backdoor option.
This drill helps your 4 become a better passer.
2 can work on different types of finishes-reverse lay-up.
Ball fake. Up and under move. Left and Right hand finishing.
On the catch 2 sprints out the the 3-point line and then cuts backdoor.