This post was created by Kyle Gilreath.
I found the drill on FastModel’s plays and drills library.
It contains over 2000 drills and plays in the library. Here is the link. FastModel Drills and Plays Library
Here is what Kyle wrote about the drill:
This is a great offensive and defensive peer pressure drill that can help your players improve their toughness.
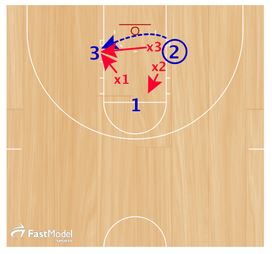
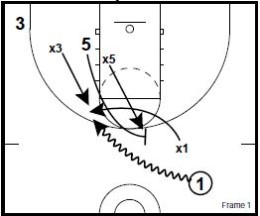
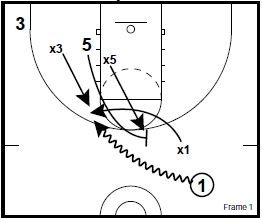
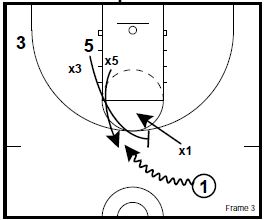
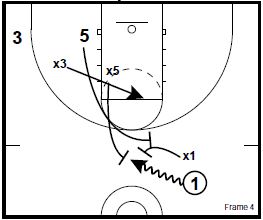
x1 and x2 trap 1.
1 must be strong with the ball trying to pass to 2 or 3.
1 must utilize pass fakes to lead x3 and pass to the open man.

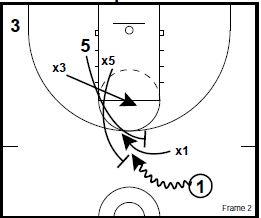
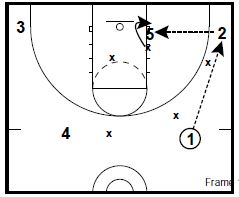
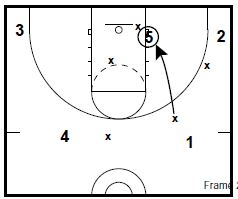
If 1 passes to 2, x2 and x3 become the new trappers.
Drill continues until the defense gets a deflection or causes a turnover.