This competitive scoring drill came from the FastModel Sports Basketball Plays and Drills Library.
You can also find out more about FastModel Play Diagramming software by clicking this link: FastDraw
This drill was contributed by Coach Fabian McKenzie, Cape Breton University Women’s Basketball.
He has been a head coach at the university level for 16 years, and has been involved as a coach at this level for 20 years.
He has been involved with the Canadian Women’s National team program for the past 8 years.
If the setup for the drill does not fit your needs, tweak the version you run so that it does.
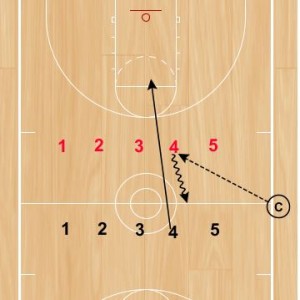
“31”

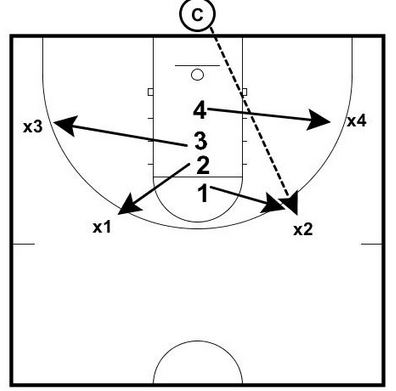
Players line up as shown. First player in each line has ball
When coach blows whistle they head to basket and take a choice of shots.
3 pt shot = 3
Inside 3 but outside paint = 2
Layup = 1
They get one shot attempt. If they make it they collect the points for their team.
If they miss they must rebound and get ball to next teammate.
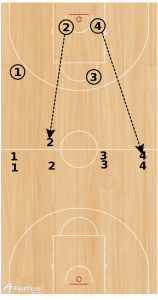
This is a continuous action drill
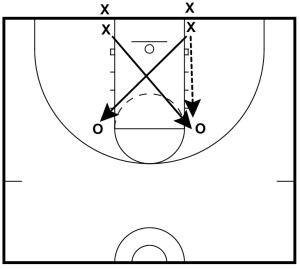
Our only rule is that your next pass to a teammate must be received on the same side of half court.
In this example, 2’s pass is good. 4’s is illegal and they must go back to opposite side of half before attempting shot at other end.
You could also deduct a point for the infraction.
Drill continues until a team reaches a score of 31