Here are 3 finishing drills to consider for your skill workouts.
There are links to other skill development drills at the bottom of the post.
I think it is good to have a variety of drills to use that still fit your system of play, fit the skills you need the players to develop, and that fit your philosophy.
Diagrams created with FastDraw
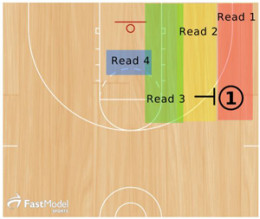
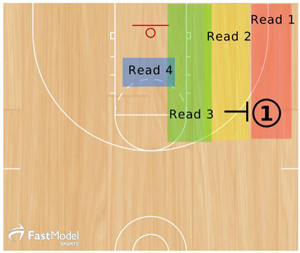
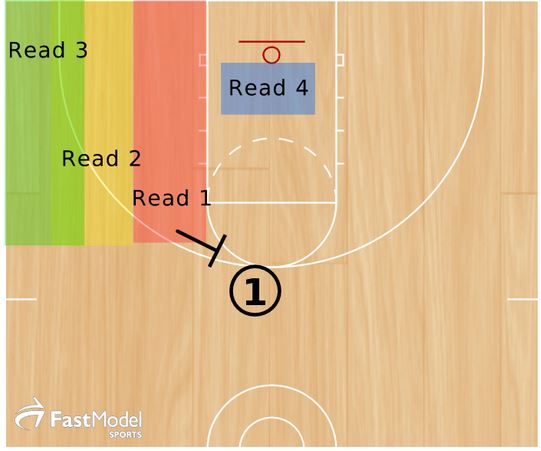
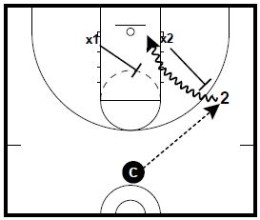
Baylor 1 vs. 2
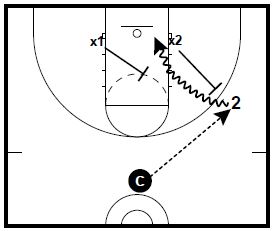
Coach initiates the action by passing the ball to offense with two defenders starting on the blocks.
The defenders move as soon as the ball leaves the coaches hands.
During closeout, offense needs to beat his defender and then get past the help.
Emphasize the attack by limiting dribbles, focusing on first step, step through, and working on a specific finishing move.
Alabama 1 on 1
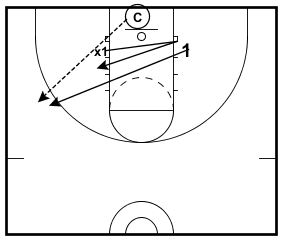
From the Kansas women’s program.
Coach has the basketball under the basket. Offense begins on one block, defense begins on the opposite block.
Coach tosses the basketball out,
Offense goes out to get the basketball.
Defensive player touches the opposite block and then closes out on the offense.
Play live 1-on-1 from there.
1 on 1 Lane Containment

Also from the Kansas women’s program.
OBJECTIVE: Improve ball-handling in a tight space & improve defensive footwork.
Boundaries are the lane lines. Offense starts with the ball between the free throw line and top of key. Defense begins an arm’s distance away from offense.
Offense’s goal is to beat the defense to the baseline in 6 seconds without going outside the lane lines or turning her back to the defense while dribbling. Defensive goal is to force offense outside the lane lines or don’t get beat to the baseline in 6 seconds. You can progress drill to have offense finish with a one-footed lay-up.