This quick hitting play is from an old Xavier University Basketball Coaching Newsletter.
You can access their archvie at this link: Xavier Men’s Basketball Newsletter
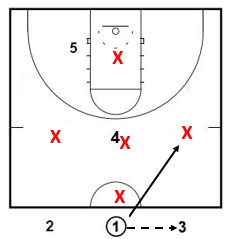
Run this against a 2-3 zone as an entry into your zone attack., or as a set play to get the ball inside.
At the bottom of the page, I have listed some more links to other zone plays.
They call this play “Baseline Runner PT Thru”
The post is not intended to say that all programs should run this play as is.
But, hopefully it sparks some ideas for either incorporating a few of these movements (or a tweak that you make to them) into what you already do.
If you are looking for other resources you can click here to see our products that relate to attacking zone defenses. There are some sample videos included in these as well: Zone Offense Resources
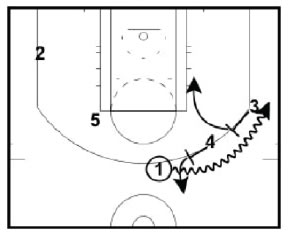
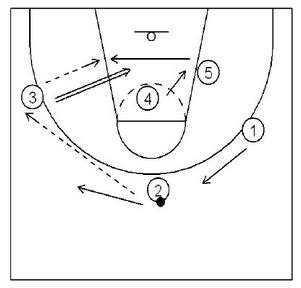
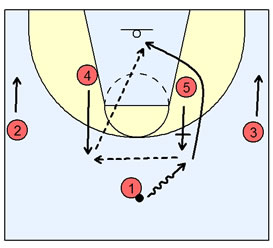
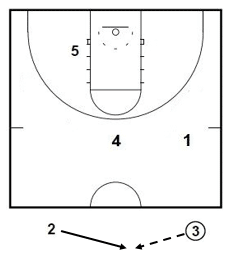
Two guard front.
3 circles into the high post area.
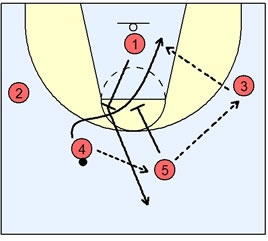
1 passes to 3.
2 moves away.
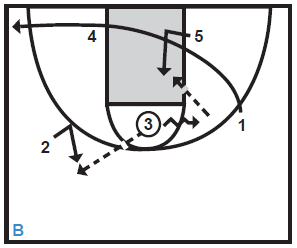
1 then sprints to the opposite corner.
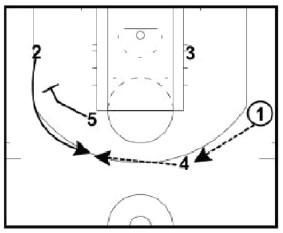
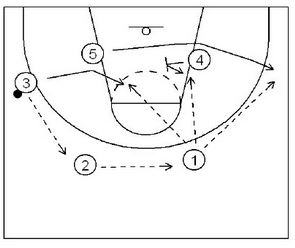
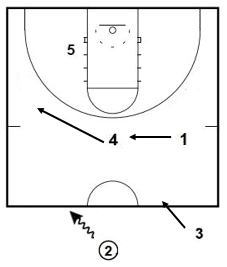
3 looks at 5 for a possible duck in first.
If not available, 3 passes to 2.
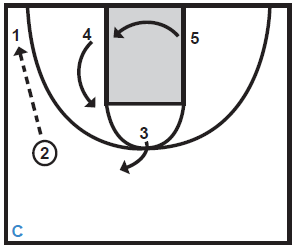
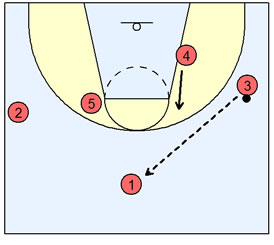
2 quickly passes to 1.
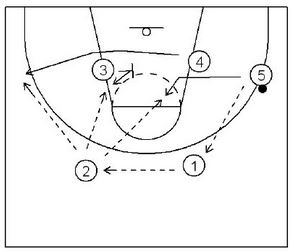
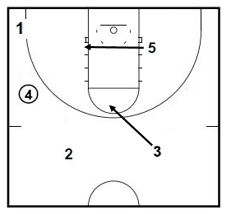
On the catch by 1, 4 slides up the lane.
5 sprints to the ball side block.
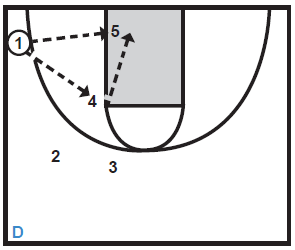
1 can pass to 4 at high post or 5 in low post.
If you are looking for other resources you can click here to see our products that relate to attacking zone defenses. There are some sample videos included in these as well: Zone Offense Resources