This shooting drill was diagrammed and contributed by Joel Hueser to the FastModel Sports Basketball Plays and Drills Library.
You can also find out more about FastModel Play Diagramming software by clicking this link: FastDraw
Coach Hueser is the Head Boys Coach at Papillion-LaVista South High School High School in Nebraska.
This is what he said about the drill:
We are big fans of a UNO (University of Nebraska Omaha) shooting drill Coach Derrin Hansen (@DerrinHansen) shared with us almost ten years ago. Throughout the course of the summer and fall many of our players will do this drill 2-3 times a week if not more. When it’s all said and done, each player will have made 100 shots (80 field goals and 20 free throws). The workout can be finished in 20-25 minutes depending on age, skill level and intensity. We like the variety of game-like conditions presented in this workout: shooting, passing and rebounding.
You can modify the drill to shoot more 3s if that is what you are looking for. There are 2 videos of players executing the drill below the diagrams.
The drill has 3 phases.
To complete each portion of the drill, the players must make the specified number of shots. Have the rebounder count out loud how many they are shooting after each shot attempt. Example: 1 for 2, 2 for 3, 3 for 4, 3 for 5, etc…
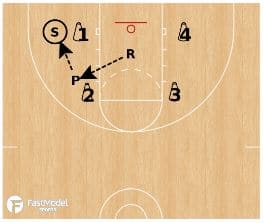
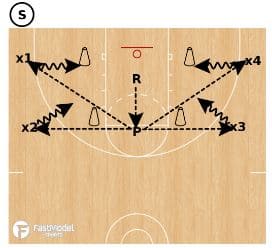
Phase #1: 4 Spot Shooting (40 Made shots–32 FGs 8 FTs)

Shooter makes 8 from spot 1 (cone).
Shooter then makes 2 freethrows.
Passer rotates to Shooter and Rebounder to Passer.
Repeat until all 3 players have shot from all 4 spots (cones).
Points of Emphasis:
-Be shot ready.
-Good pass equals a good shot.
-3 players and 2 balls are needed for this drill.
***Coach Derrin Hansen of University of Nebraska-Omaha deserves the credit for this shooting drill***
Phase #2 Back & Forth (40 Made shots–32 FGs 8 FTs)

Combo 1: Shooter cuts back & forth from spot 1 to 2 (corner-elbow) and makes 8.
Shooter then makes 2 freethrows.
Passer rotates to Shooter and Rebounder to Passer.
Repeat until all 3 players have shot.
Points of Emphasis:
-Get your homework done early (we emphasize inside step).
-Game speed.
-Overhead pass when the shooter moves away from the passer.
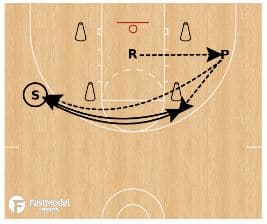
Combo 2: Shooter cuts back & forth from spot 2 to 3 (wing-elbow) and makes 8.
Shooter then makes 2 free throws.
Passer rotates to Shooter and Rebounder to Passer.
Repeat until all 3 players have shot from all 4 combos.
Points of Emphasis:
-Combos 3 & 4 are the same on the opposite side.
-Shooter should always land 6″ forward.
-Mastery of the overhead pass!
Phase #3 Around the World (16 FGs 4 FTs)
Round 1: Shooter moves around the arc and makes 8 from the 4 spots off the catch (no dribble).
Shooter then makes 2 freethrows.
Round 2: Shooter moves around the arc and makes 8 from the 4 spots off the dribble (1-2 bounces).
Passer rotates to Shooter and Rebounder to Passer.
Repeat until all 3 players have done both.
Points of Emphasis:
-Shooter should catch outside the arc relative to the 4 spots.
-Utilize blow-by and crossover moves.
-Drive the ball; don’t dribble it.
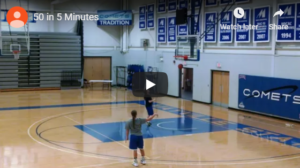
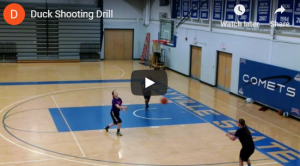
Here are a couple of You Tube videos with players going through the drill: